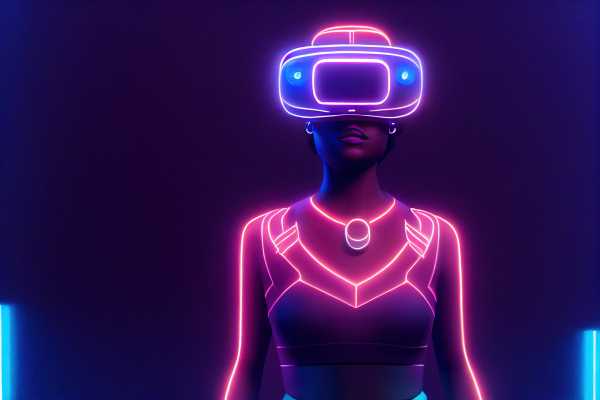
Imagine stepping into a magical forest. The trees sway gently as you hear birds chirping above and a brook bubbling nearby. As you walk forward, the forest clears to reveal a hidden castle, its grand doors waiting to be opened. This immersive experience, where you feel like you’ve entered another world, is the power of Virtual Reality (VR).
In this article, we’ll explore how VR works and guide you through building your first simple VR scene using Unity, a popular game development platform, and C#. Using the example of a virtual magical forest, we’ll break down each step so it’s easy to understand and follow, even if you’re new to VR or programming.
What Is Virtual Reality?
Virtual Reality is a technology that creates a simulated environment where users can interact with a 3D world using specialized equipment like VR headsets and controllers. Unlike traditional screens, VR immerses users by simulating their physical presence in a virtual space.
- How it works: VR relies on:
- Headsets: Devices like the Oculus Quest or HTC Vive display the 3D environment, adjusting visuals as you move your head.
- Controllers: Allow you to interact with objects in the virtual world.
- Sensors: Track your movements to make the experience realistic.
- Applications: VR is used in gaming, education, training simulations, and even therapy. For this tutorial, we’ll focus on a creative application: building a simple VR scene of a magical forest.
Tools You’ll Need
To create a VR scene, you’ll need:
- Unity: A free, beginner-friendly game development platform.
- C#: A programming language used in Unity to add functionality to objects.
- VR Headset: Optional for testing your scene, but not required for development.
- PC or Mac: A computer capable of running Unity.
We’ll walk you through setting up Unity and building a magical forest VR scene step by step.
Step 1: Setting Up Unity
- Download Unity:
- Go to Unity’s website and download the Unity Hub.
- Install the latest version of Unity with VR support.
- Create a New Project:
- Open Unity Hub, click “New Project,” and select the 3D template.
- Name your project “MagicalForestVR” and click “Create.”
- Install VR SDK:
- In Unity, go to “Window > Package Manager.”
- Search for and install the XR Interaction Toolkit, which supports VR development.
Step 2: Designing Your VR Scene
Think of your VR scene as a stage where everything happens. In our example, we’ll design a magical forest with trees, a brook, and a castle.
- Add a Terrain:
- In Unity, right-click in the “Hierarchy” panel and select “3D Object > Terrain.”
- This creates a flat ground. Use the terrain tools to shape hills and add textures for grass.
- Add Trees and Rocks:
- Go to the “Asset Store” in Unity and download free 3D models of trees and rocks.
- Drag and drop these models into your scene.
- Add a Brook:
- Create a small trench in the terrain and add a water asset.
- Adjust the water’s color and reflection settings to make it look realistic.
- Place the Castle:
- Download a free castle model and position it at the center of your scene.
Step 3: Adding VR Interactions
To make your VR scene interactive, we’ll use the XR Interaction Toolkit and write some simple C# scripts.
- Enable VR Camera:
- Delete the default camera in the “Hierarchy” panel.
- Right-click and select “XR > Room-Scale XR Rig.”
- This adds a VR-compatible camera and controllers.
- Add Interactions:
- Attach the “XR Grab Interactable” component to objects you want to pick up, like rocks or twigs.
- Use Unity’s “Event System” to trigger actions, such as opening the castle doors when the player approaches.
Step 4: Writing C# Scripts
Let’s write a simple script to open the castle doors when the player reaches them.
- Create a Script:
In the “Assets” folder, right-click and select “Create > C# Script.” Name it “DoorOpener.”
2. Write the Code:
using UnityEngine;

public class DoorOpener : MonoBehaviour
{
    public GameObject door;

    void OnTriggerEnter(Collider other)
    {
        if (other.CompareTag("Player"))
        {
            door.transform.Rotate(0, 90, 0); // Rotate door 90 degrees to open it.
        }
    }
}
3. Attach the Script:
- Add a “Collider” component to the castle entrance and set it as a trigger.
- Drag the “DoorOpener” script onto the trigger object.
- Link the castle door to the script.
Also check: How Artificial Intelligence Works
Step 5: Testing Your VR Scene
- Play in Editor:
- Press “Play” in Unity to test your scene without a VR headset. Use keyboard controls to navigate.
- Test with a VR Headset:
- Connect your headset to your PC and select the appropriate VR build settings in Unity.
- Run your scene and explore the magical forest in VR.
Step 6: Exporting Your VR Scene
Once you’re satisfied with your scene, export it so others can experience it:
- Build Settings:
- Go to “File > Build Settings.”
- Select your target platform (e.g., Windows, Android for Oculus).
- Build and Run:
- Click “Build and Run” to generate an executable file.
- Share the file with friends or upload it to a VR content platform.
Conclusion
Creating a VR experience may seem daunting at first, but by breaking it down into manageable steps, anyone can build their own immersive world. Using Unity and C#, we designed a magical forest VR scene complete with interactive elements like opening doors and exploring serene landscapes.
The magical forest is just the beginning. With the foundational skills you’ve learned, you can create even more complex and engaging VR experiences. So, put on your VR headset, step into your scene, and let your imagination guide you!

Reply